Monday 9 December 2013

In The Frame

It's Release Week at Flourishes!!  This months challenge is a Sketch - and there's a choice of two.  I chose to use Sketch B - and it was quite a challenge because angled panels are really not my thing, but I have to admit that I rather enjoyed this one and am happy with the result!  The background papers are from the Rejoice paper pad by Creative Imaginations layered onto dark green cardstock, and the other panel is white cardstock die cut with a Spellbinders Romantic Rectangle.  I created a frame by die cutting white cardstock with a Spellbinders Floral Oval die and then with a Small Classic Oval.  Then I made a notched tag for the sentiment which is from Flourishes Christmas Classics.  Finally, I stamped the Santa Boot from Flourishes Dear Santa set with Memento ink onto blending card, coloured it with copics, cut it out and mounted it in the frame with foam tape.

Copic Colours used were:  G40, G43, G46, Y21, Y35, Y38, R22, R24, B0000, B000, B00, C1, C3, C5, C7, C9.

Thanks for visiting and greetings of the Season to you!

Friday 6 December 2013

Joy To The World!

The challenge at Timeless Tuesday this week is to use faux or real stitching.  Well, my sewing machine is currently buried under a mound of papercraft supplies (!) so it was faux stitching for me!  I started with some white cardstock and stamped this gorgeous Christmas tree image from Flourishes Trimmed with Love set.  I added a little colour to the starlight and to the ground, die cut it with a Spellbinders Labels 8 and then drew my faux stitching around the edge with a black multiliner.  Then I stamped the image again with Memento ink onto blending card, coloured it with copics, cut it out and mounted it with foam tape over the first image.  I die cut some red cardstock with a Spellbinders Decorative Labels 8 and added the image piece.  Then I stamped the sentiment (also from the Trimmed with Love set) with red ink onto white cardstock, punched it out with a circle punch and inked the edge.  I die cut some green cardstock with a Spellbinders Star Circle die, added it to the background and popped the sentiment piece on top with foam tape.  Again, my card had to be something pretty quick and simple, as my Dad is still in hospital (but now in one closer to home, thank goodness).   He is recovering remarkably well.  Many thanks to those who sent good wishes.

Copic Colours used were:  Y000, B0000, G40, G43, G46, Y21, Y35, Y38, R24, R27,C1, C3.

Thanks for coming to visit!


Thursday 28 November 2013

Scored for Christmas


This weeks challenge at Timeless Tuesday is to use scoring, piercing and colouring.  Well, time is very limited for me this week as my 95 year old Dad is in hospital with a fractured hip and I'm driving 45 minutes each way to the hospital every day, so this one had to be super simple!  I punched the edge of white cardstock with Martha Stewart's doily lace border punch, and cut it to size .  Then I simply scored just inside each edge and stamped the sentiment which is from Flourishes Holiday Greetings set with Real Red ink (Stampin' Up!) and then layered it onto red cardstock.  Then I die cut some  more red cardstock with Flourishes Perfectly Pierced Victorian Oval Template Die - so that was the piercing done!  I stamped one of the stockings from the image from Flourishes Christmas Classics set with Memento Tuxedo Black onto blending card, coloured it with copics and die cut it with the small oval die from the same Flourishes Victorian Oval Template.  I added the red pierced piece to the background with foam tape  and I put foam tape under the image piece too.  A very simple red and white card - but - challenge completed!

Copic Colours used were:  R22, R24, R27, R89, Y21, Y26, G21, G24, B0000.

Thanks so much for visiting!

Friday 22 November 2013

Brrrr - Snow!

At Timeless Tuesday this week, the challenge is to make a card with a winter scene.  Well, I didn't have a lot to choose from for this one - remember, in Australia, winter scenes look pretty much the same as summer ones so a winter scene is a bit of a foreign concept!!  However, I thought this little image from Flourishes Joy Is In The Air would suit nicely.  I used Cherry Cobler cardstock (Stampin' Up!) throughout this one, and the papers are from Kaisercraft's Just Believe paper pad.  I stamped the greeting (from Flourishes Holiday Topiaries set) with Cherry Cobler ink directly onto the patterned paper and die cut it with a Spellbinders Labels 8.  The centre horizontal panel was layered onto the cardstock which had been punched with a Martha Stewart border punch, another panel was layered on the top and red grosgrain ribbon wrapped around it and a bow added.  I stamped the image with Memento Tuxedo Black onto blending card, coloured it with copics, die cut it with a Spellbinders Standard Circle and layered it onto red cardstock die cut with a Spellbinders Lacey Circle.  Finally the image piece was added with foam tape.

Copic Colours used were:  B0000, R35, R37, R89, YG61, YG63, YG67, YG95, YG97, G82, G85, Y21, YR20, YR21.

Thanks for coming to visit!

Friday 15 November 2013

Down The Chimney

At Flourishes Timeless Tuesday, this week it's a Sketch Challenge.  Oooo - I love those because half the work is already done!   Ally even gave us two sketches to choose from - I chose the second one.  The background papers for this one all come from the Rejoice Collection by BoBunny.  I layered the first piece onto dark red cardstock, the second piece onto dark brown cardstock and the strip piece onto dark red.  The image is from Flourishes Joy Is In The Air stamp set, and was stamped with Memento Tuxedo Black onto blending card, coloured with copics and die cut with a Spellbinders Captivating Squares die.  This was added to the background with foam tape.  The sentiment is from Flourishes Paperwhites set and was stamped with Cherry Cobler ink (Stampin' Up!) onto white cardstock and  made into a notched tag.  The final touch was a nice red button tied with dark green cotton.

Copic Colours used were:  E000, E01, E11, E15, C1, C3, C5, C7, B0000, B00, R24, R27, R89, G43, G46, Y21.

Thanks so much for coming to visit!

Thursday 14 November 2013

Warm Greetings

Yay! It's Release Week at Flourishes and this month, the challenge is to make something warm and inviting with a picture in blue and browns with a coffee cup as an inspiration.  Well, this one took a while for me to get into the spirit - it's Summer here in Australia with high temperatures and bush fires......and I don't drink coffee!!  Ah Well, I find there's always a Flourishes stamp in my - er - extensive collection to fit the bill.  So it was this great image from Flourishes Stitched For You stamp set to the rescue.  I started with dark brown cardstock and layered on some Kaisercraft paper - I think the collection was called Cocco.  Then I took another piece from the same collection and layered it onto light brown cardstock and added that to the background.  Next I die cut dark brown and dark blue cardstock with dies from Spellbinders Marvelous Squares, stuck them together and added them.  I stamped the sentiment (from Flourishes Autumn Blossoms) with Memento Rich Cocoa onto white cardstock and made a notched tag layered onto light brown cardstock.  Finally I stamped the image with Memento Tuxedo Black onto blending card, coloured it with copics, cut it into a rectangle, layered it onto light brown cardstock, and added it with foam tape.

Copic Colours used were:  B0000, B000, B00, B02, B21, B23, B26, E000, E11, E23, E25, E27, E43, E44, E47.

Thanks for coming to visit!

Friday 8 November 2013

Merry!


The challenge at Timeless Tuesday this week is to use negative die cutting - i.e. to use the piece of cardstock that you usually throw away after cutting.  I wanted to use my new Flourishes Holiday Topiaries stamp set, and was delighted to discover that this image fitted perfectly in the long oval from Spellbinders Radiant Rectangles set.  So, I die cut some dark red cardstock with the oval, surrounding it with the next size rectangle, creating a frame.  The background paper is from A Vintage Christmas paper pack from Meg's Garden, layered onto dark red cardstock.  I border punched some white cardstock with a Martha Stewart punch and added it to the background, then wrapped dark red grosgrain ribbon around it.  I stamped the image onto blending card, coloured it with copics and roughly cut it into a rectangle, added it to the background and added the frame with foam tape.  The sentiment is from Flourishes Trimmed with Love stamp set, stamped with dark red ink and die cut with the tiny die from Flourishes Perfectly Pierced Victorian Oval Template Dies.  A little bow at the bottom of the ribbon, and it was finished.

Copic Colours used were:  G40, G43, G46, R35, R37, R89, C1, C3, C5, E13, E15, E25, E27, E29.

Thanks for coming to visit!

Saturday 2 November 2013

The Great Outdoors

This weeks challenge at Timeless Tuesday is to use houndstooth or plaid - this is pronounced "played" here in Australia (just a bit of trivia!).  I was a bit surprised at how many of my paper pads featured plaid, but I eventually chose to use papers from Playdate DSP by My Mind's Eye.  I layered two pieces (including plaid) onto brown cardstock and across the join, I added brown May Arts Mesh plus brown grosgrain ribbon with a knot tied in it.  Then I die cut more brown cardstock with a Spellbinders Labels 22 die and added that to the background.  Finally, I stamped the image from my newly arrived Flourishes In Nature stamp set, with Memento Rich Cocoa, added the sentiment (from Flourishes Tag Lines) with Tuxedo Black, coloured it with copics, die cut it with a Spellbinders Standard Circle die and added it with foam tape.  This will be for my dear SIL's birthday next week!

Copic Colours used were: B0000, BG000, BG01, BG02, YG61, YG63, YG11, YG13, YG17, E11, E13, E15, E25, E27.

Thanks for visiting my blog!

Thursday 31 October 2013

Happy Birthday, Christine

Flourishes is celebrating the birthday of the amazingly talented Christine Okken and we've been asked to make a special card to show how much we appreciate her work, and to help celebrate her birthday.  I chose Flourishes Sweet Peas stamp set for my card.  First, I inked up the large image with Memento Gray Flannel ink, stamped it once onto scrap paper, then onto blending card.  Then I stamped the smaller image with Memento Tuxedo Black onto blending card and die cut it with Spellbinders Labels Four.  I coloured the larger image with light copic colours, cut it into a rectangle and layered it onto green cardstock.  I coloured the smaller image with slightly darker colours, added the sentiment from Flourishes Tag Lines and layered that onto green cardstock also.  The background papers are from Papermania's Capsule Collection, layered onto green cardstock and I added half a paper doily.  Some pale blue pearls in the top right corner and it was finished.

Copic Colours used were:  B0000, B000, B00, B02, G20, G21, G24.

Thanks for coming to visit! 

Thursday 24 October 2013

Birthday Dahlias

This weeks challenge at Timeless Tuesday is to use fussy cutting.  Well, this is something I quite enjoy (which is a good thing seeing that I don't own a Silhouette machine!!)  I needed to make a birthday card with an oriental feel for a friend, so I chose background papers from Oriental Treasures DSP (Papermania) and layered them onto black cardstock.  I punched some gold foil cardstock with Martha Stewart's doily lace punch and adhered that across the join.  Then I added black satin ribbon down the middle and a bow.  I die cut black cardstock with a Spellbinders Radiant Rectangles die and added that to the background.  Then I stamped the sentiment (from Flourishes Winter Blossom set) with black ink onto another piece of the background paper, die cut it with the oval die from Radiant Rectangles and added it to the black piece.  Finally, I stamped the image from Flourishes Dahlias stamp set with Memento ink onto blending card, coloured it with copics, cut it out with scissors and attached it to my card front with foam tape.

Copic Colours used were:  R32, R35, R37, R89, Y35, Y38, G43, G46, G85.

Thanks so much for visiting my blog!

Wednesday 23 October 2013

Spooky

The challenge this month at Scrapbook Boutique is to use purple, orange and black with a Halloween theme.  Well, at first, I was at a bit of a loss - Halloween is definitely NOT my thing!  Then I remembered that my DD had inadvertently included a Halloween stamp set with a parcel of stamps that she sent to "holiday" at my house!  It is a retired set from JustRite Stampers called Trick or Treat.  Okay, that was the image sorted, but what about the layout??  (I think my mojo went into the operating theatre with my DH last week and hasn't yet returned!)  TahDah!  The very talented Allison Cope came to the rescue with this weeks Sketch Challenge at Split Coast Stampers (Thanks, Ally!)
So, I used some papers from my stash, some black and orange cardstock, plus a Couture Creations embossing folder and created the background.  Then I stamped the pumpkin in the witch's hat image with Memento ink onto blending card, coloured it with copics, die cut it with a Spellbinders Classic Oval die, layered it onto a black oval and added it to the background with foam tape.  The sentiment was hand printed.

Copic Colours used were: C3, C5, C7, C9, BV00, BV02, BV04, YR02, YR04, YR07, YG13, YG17.

Thanks so much for coming to visit!

Friday 18 October 2013

Country Christmas

The challenge this week at Timeless Tuesday is to use Canvas or Burlap.  Well, I went searching through my craft room (not a job for the faint-hearted!) and finally found a bag of Christmas embellishment containing - Aha! - a piece of red and a piece of green Burlap - generally called Hessian here in Australia.  I started my card with paper from Christmas Basics DSP (Crafter's Choice) and layered it onto dark green cardstock.  I fringed the edges of a rectangle of green hessian and added it to the background and anchored the corners with large white brads.  Next, I made the frame by die cutting red cardstock with two Spellbinders Labels 18 dies and adhered that to the hessian.  I stamped the sentiment from Flourishes Christmas Classics stamp set with red ink onto white cardstock, cut it out and added it at the bottom of the frame.  Then I stamped the image (also from Christmas Classics stamp set) with Memento ink onto blending card, coloured it with copics, cut it out and added it to the frame with foam tape.

Copic Colours used were:  R22, R24, R27, R89, Y21, Y35, Y38, V04, V12, G20, G24, G28, G40, G43, G82.

Thanks so much for visiting!

Friday 11 October 2013

Elegant Lady

The challenge at Timeless Tuesday this week is to use pearls and lace.  Yay!  Two of my favourite embellishments!  I thought Flourishes Glamour Girls stamp set would be perfect for this one, so I stamped this lady with Memento Tuxedo Black ink onto blending card, coloured it with copics, die cut it with a Spellbinders Classic Oval die and layered it onto blue cardstock die cut with a slightly larger Classic Oval.  The background paper is from Papermania's Capsule Collection layered onto blue cardstock.  I adhered white cotton lace down the left side and added blue ribbon.  Then I die cut black cardstock with the large Spellbinders Floral Oval and added that to the background, then added white cardstock die cut with a Spellbinders Big Scalloped Oval.  I attached the image piece with foam tape and finally added black pearls to the ribbon and in each of the right side corners.

Copic Colours used were:  E000, E01, E11, E50, Y21, Y26, B21, B24, B26, C3, C5, C7.

Thanks so much for coming to visit!

Thursday 10 October 2013

Aussie, Aussie, Aussie


To celebrate World Cardmaking Day, Flourishes has asked for a card that relates to our own little Corner of the World.  Well, for an Aussie girl like me, that was an easy choice since Flourishes has a gorgeous stamp set called Bloomin' Aussie Florals.  I chose the Golden Wattle image, firstly because the golden wattle is the national floral emblem of Australia, and, secondly because of the green and gold colours which are our sporting colours.  At an international sporting event, you will see the golden boxing kangaroo on a green flag with people chanting "Aussie, Aussie, Aussie" and others gleefully responding "Oi, Oi, Oi".  I know - it's a crazy slogan, but has really caught on here in the "land downunder".
Anyway, I used paper from Kaisercraft's Great Southern Land DSP for this card (very appropriate, I thought!).  I embossed the sand coloured paper with Couture Creations Allora embossing folder because I think it reflects the shape of the wattle blooms, and layered it onto green cardstock.  Then I layered some of the wattle paper onto more green cardstock and added that to the background.  The sentiment is from Stampin' Up!'s Elegant Cheer stamp set.  Then I stamped the wattle image and name with Memento ink onto blending card, coloured it with copics, die cut it with a Spellbinders Labels 17 and layered it onto green cardstock.  Finally the image piece was added with foam tape.

Copic Colours used were:  Y11, Y15, Y17, YG61, YG63 and C1 to desaturate the green a little.

Thanks for visiting and I hope you had a great time on World Cardmaking Day!

Wednesday 9 October 2013

Christmas Whimsy

The October Release Challenge over at Flourishes is for a Christmas card with NO red or green.  Well, being a traditional kind of girl, this was a bit of a challenge for me!  However, my dear friend, Kaye, has very recently given me a 12" x 12" paper pad called Whimsical Christmas Basics by Francheville, so the background papers were an easy choice.  I layered them onto pink cardstock and covered the join with lilac cardstock which had been punched out with Martha Stewart's doily lace punch.  Then I die cut pink cardstock with a Spellbinders Lattice Rectangles die and added this to the background.  I stamped the boot from Flourishes Dear Santa stamp set with Memento ink onto blending card, coloured it with copics,added some clear Spica to the buckle, cut it out and added it with foam tape.  The sentiment is also from the Dear Santa set.  Then I added some bling with rhinestone stars.  A pink ribbon and a bow and it was finished!

Copic Colours used were:  BG32, BG45, BG49, B000, BV01, BV02, BV04, RV52, RV55, RV66, Y00, C1, C3, C5, C7, C9.

Thanks for coming to visit!

Sunday 6 October 2013

A Baby is a Blessing

The challenge at Timeless Tuesday this week is to use paper piecing.  I don't use this technique very often, but it is fun and gives a very different look from straight colouring.  I started this card with white cardstock.  I punched one side with a Martha Stewart border punch and embossed the rest with a Sizzix embossing folder, then layered this onto pink cardstock.  I wrapped pink spot ribbon around  it and added a bow.  Then I stamped the sentiment from Flourishes Hello Baby stamp set with Memento ink onto white cardstock, die cut it with a Spellbinders Floral Doily Motifs die and layered it onto pink cardstock die cut with a Spellbinders Standard Circle die and added this to the background.  Then I stamped the baby suit onto blending card and again onto paper from the With Love paper pack (Papermania).  Then I stamped the booties onto blending card and then twice onto the same patterned paper making sure each bootie had the hearts going in the same direction.  I coloured the ribbed bands and the inside of the baby suit on the blending card and also the inside of the booties.  Then I cut out the suit from the paper omitting the bands and the inside and also each of the booties omitting the insides.  I adhered the paper pieces onto the blending card pieces (I found a glue stick is ideal for this!) and added them to the background with foam tape.  Finally I added two tiny pearls for the bootie "buttons".

Copic Colours used were: B0000, RV52, RV55.

Thanks for visiting my blog!

Saturday 28 September 2013

Engagement Roses

Over at A.R.T. this week, it's "Anything Goes" so I thought that this engagement card would be just the thing!  I started with a square of white cardstock, embossed it with a square Mpress embossing folder and layered it onto red cardstock.  Then I added white cotton lace and red ribbon with a red bow down the left side.  I stamped the sentiment (from Flourishes Wedded Bliss set) with Memento ink onto white cardstock and die cut it with a Spellbinders Opulent Oval die.   Next I die cut white cardstock with the large Spellbinders Floral Oval die and added it to the background plus a red cardstock oval and then the sentiment piece.  Finally, I stamped the roses image from Flourishes Calendar Set 2 with Memento ink onto blending card, coloured it with copics, cut it out and added it with foam tape.

Copic Colours used were:  R22, R24, R27, G24, G28.

Thanks for coming to visit!

Thursday 26 September 2013

Springtime

This months challenge at Scrapbook Boutique is for a Spring theme with a focus on daffodils, yellow and white.  I started this card with a piece of white cardstock  - I punched one end with a Martha Stewart border punch and embossed the rest with a Cuttlebug embossing folder, then layered this onto yellow cardstock.  I stamped the sentiment (from Flourishes Happily Ever After stamp set) onto white cardstock, layered it onto yellow cardstock and adhered it at the bottom of the background.  I stamped the daffodils image (from Flourishes Calendar Set 1 set) onto blending card, coloured it with copics, die cut it with a Spellbinders Opulent Oval die and sponged some yellow ink around the edges.  I stamped the image again, coloured the centre flower, cut it out and added it to the original image with foam tape.  Then I die cut yellow cardstock with the next size Opulent Oval die, added it to the background and attached the image piece with foam tape.  Some white pearls in the top corners and it was finished.

Copic Colours used were:  Y000, Y11, Y15, Y17, YG11, YG13.

Thanks for visiting my blog!

Wednesday 25 September 2013

Going Dotty


The challenge this week at Flourishes 
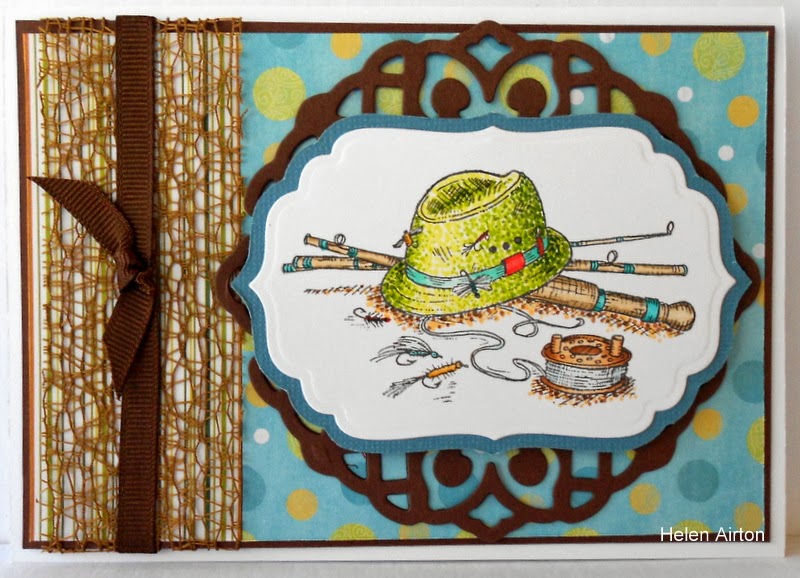
Timeless Tuesday is to use a technique called POINTILLISM!!  Be sure to check out the tutorial by the very talented Allison Cope on this one.  In short, it is to colour the image or background using DOTS of colour!  I chose this image from Flourishes What A Catch stamp set, stamped it with Memento ink onto blending card, coloured it with copics, die cut it with a Spellbinders Labels Four and layered it onto dull blue cardstock.  For the background, I used paper from the Karen Foster collection, layered onto dark brown cardstock.  I added brown May Arts mesh with dark brown grosgrain ribbon and a knot.  I die cut dark brown cardstock with Spellbinders Lattice Pendant, added that to the background and then added the image piece with foam tape.
Thanks, Ally, for a great challenge - it was interesting and fun!

Copic Colours used were: YG00, YG03, YG63, YG67, BG11, BG13, BG15, BG45, BG49, B0000, B000, YR21, YR23, E21, E23, E25, E41, E44, E47, R22, R24.

Thanks so much for coming to visit!

Sunday 22 September 2013

You Are My Sunshine

This weeks challenge at Flourishes Timeless Tuesday is to use an image showing a light source - e.g. a candle, lamp, lighthouse etc.  Well, I have been making calendars to sell in my craft group's Christmas Shop and I had just finished this one with a sun and cloud image, so, I thought - challenge completed!! (There's no bigger light source than the sun!).  I start these calendars with heavy cardboard cut into a 5 1/2" x 4" rectangle and covered this one with paper from Papermania's Capsule Collection DSP.  I add a ribbon hanging loop and cover the back with white cardstock.  A tear-off calendar goes on the bottom and then the top is decorated with a stamped image.  For this one, I stamped the sun and cloud image (from Flourishes April Showers set) with Memento ink onto blending card, added the sentiment (from Flourishes Sunflowers set), coloured it with copics, die cut it with a Spellbinders Labels One and layered it onto blue cardstock cut into a square.  Then I die cut yellow cardstock with a Spellbinders Lacey Circle and attached it to the background and popped the image piece on top with foam tape.  Finally, I stuck a magnet strip on the back.  I now have 20 of these magnetic calendars made and they are all different!

Copic Colours used were:  Y21, Y35, Y38, B0000, B000.

Thanks for coming to visit!

Monday 16 September 2013

Pretty in Pink

The challenge this week at A.R.T. (a random Thursday card challenge) is to make a baby girl card......easy!!  I found some pretty pink paper in my stash and layered it onto a deeper pink cardstock for the base.  Then I punched one end of a piece of white cardstock with a Martha Stewart border punch.  I embossed the rest of this piece with a Cuttlebug EF,  layered it onto pink cardstock and wrapped it with a pink stitched ribbon.  I stamped the pram stamp (from Impressive Stamps Australia) with Memento ink onto blending card, coloured it with copics, added the welcome sentiment (from Warm Words set - Stampin' Up!) in pink ink, die cut it with a Spellbinders Standard Circle die and then layered it onto pink cardstock die cut with a Spellbinders Scallop Circle die.  I added the image piece with foam tape and attached a bow and it was done!

Copic Colours used were:  RV000, RV00, RV02, B0000.

Thanks for visiting!

Thursday 12 September 2013

White Magnolias

The challenge at Flourishes Timeless Tuesday this week is to use dry embossing.  Well, that's easy! (The trick was to decide which of my four dozen plus embossing folders to use - Ha!)  I needed to make a wedding card, so I went with a white background.  I punched the side of a piece of white cardstock with a Martha Stewart border punch, then embossed the rest with a Couture Creations EF called Exotic (a favourite), then I layered that onto pale blue cardstock and wrapped pale blue satin ribbon around it just above the border.  Next, I stamped the sentiment - from  Flourishes Wedded Bliss set - with Memento Paris Dusk ink onto white card, die cut (and embossed!) it with a Spellbinders Fleur de Lis Squares die, layered it onto pale blue cardstock and added it to the background.  Then I stamped the image - from Flourishes Magnolias stamp set - with Memento Tuxedo Black ink onto blending card, coloured it with copics, cut it into a rectangle, layered it onto pale blue cardstock, and added it with foam tape.  A bow and some pearls in a couple of corners and it was finished!

Copic Colours used were:  B0000, B000, G24, G82, G85.

Thanks for coming to visit!

Monday 9 September 2013

Christmas in September

It's Release Week at Flourishes and this months challenge is to make a shaped card or a 3D item.  Well, I couldn't decide which one to do and in the end, I made both!!  For the card, I die cut a piece of folded white cardstock with a Spellbinders Labels One, then I die cut more white card with a Spellbinders Decorative Labels One and attached it to the folded base.  The paper is from Christmas Basics paper pad (Crafters Choice).  Next, I added red cardstock die cut with a Spellbinders Standard Circle die.  Then, I die cut white cardstock with a Spellbinders Renaissance Hearts Pendant.  I stamped the image from Flourishes Sweets of the Season stamp set with Memento ink onto blending card, coloured it with copics, punched it out with a Fiskars 2" circle punch and layered it onto a red circle.  I put foam tape between the paper and the first red circle and more foam tape between the pendant and the image piece.   Finally, I added white pearls and small red rhinestones around the edge of the pendant. 
The 3D Christmas Ornament was made in much the same way, using a cardboard ribbon spool for the base (the back of the ornament is the same as the front).- I've been saving my empty ribbon spools and now have a handy little pile of them to make ornaments for this Christmas.
I just can't wait to see this months release from my favourite stamp company..........five sets this month - Wow!

Copic Colours used were:  R22, R24, R27, R37, R89, YG63, YG67, C1.

Thanks so much for coming to visit!

Sunday 8 September 2013

Happiness

This week at A.R.T. it's a colour challenge.  The colours are three shades of grey (not 50, thank goodness - ha ha!!) combined with dark red and peach.  Oooooh! They were not easy!  Anyway, I started with dark red cardstock and layered on paper from Far Away paper pad (teresa collins).  Then I stamped the hydrangea image from JustRite's Botanical Medallions & Banners stamp set with Memento Tuxedo Black ink onto blending card, coloured it with copics and die cut it with a Spellbinders Standard Circle die.  Next, I die cut peach cardstock with a Spellbinders Scallop Circle and also dark red cardstock with another Spellbinders Standard Circle, then layered them all together.  I stamped the sentiment (from the same stamp set) with Memento Gray Flannel ink onto white cardstock, die cut it with a Spellbinders Labels 8, layered it onto dark red cardstock, and added it to the background.  The horizontal panel is from the same Far Away paper pad and I added dark red ribbon and a bow.  Finally, the image piece was attached with foam tape.

Copic Colours used were: C1, C3, C5, R000, R01, R02.

Thanks for visiting!!

Seed Packet Pocket

Over at Flourishes the lovely Stacy Morgan has a tutorial on making a gift card pocket from a paper bag.  Such a cute idea!  The challenge is to make something similar.  Well, I decided to make my paper bag into a pocket holding flower seed packets.  I only have white bags, so I stamped mine all over using an image from Flourishes Garden Dreams set and Memento Potter's Clay ink and Memento Bamboo Leaves ink.  I created the pocket, trimmed the top of the bag, and then punched some white cardstock with  Martha Stewart picket fence border punch, cut that to size and stuck it to the top of the bag.  Next, I stamped another image from Garden Dreams with Memento Tuxedo Black ink onto blending card, coloured it with copics and die cut it with a Spellbinders Classic Oval die.  Then, I die cut some Old Olive cardstock with Flourishes Perfectly Pierced Victorian Oval Template Die and popped the image piece on top with foam tape.  I stamped the sentiment (from Flourishes In The Garden set) with the Potter's Clay ink onto white cardstock, die cut it with the smallest Spellbinders Labels 8, sponged on some Bamboo Leaves ink and glued it to an ice block stick.  The stick and image piece were then added to the front of the project, and finally I popped a couple of flower seed packets into the pocket.  Result = a cute little gift for a gardener!!

Copic Colours used were:  E11, E13, E15, Y21, Y26, G20, G21, B0000, B000, B00, R01, R02, YG93, YG95, V04, V06, V12.

Thanks for coming to visit!

Thursday 5 September 2013

Tulips

The challenge this week atTimeless Tuesday is to use two kinds of ribbon.  Well, that's an easy one - the hard part is choosing what ribbons to use!!  So I decided on a bit of drama for this one.  I took a piece of white cardstock, punched one end with an EK border punch, and embossed the rest with a Couture Creations EF.  Then, I wrapped red satin ribbon around it, then some black and white check ribbon, then some more red satin ribbon.  I layered the background onto black cardstock, then die cut some more black cardstock with a Spellbinders Scallop Circle die and added that.  Then, I stamped the large image from Flourishes Tulips for Friends set with Memento ink onto blending card, coloured it with copics, die cut it with a Spellbinders Standard Circle die, swiped the edge with red ink and added it with foam tape.  A little "happy birthday" tag and a check bow and it was finished.

Copic Colours used were: C1, C3, C5, C7, R22, R24, R27.

Thanks for coming to visit!

Wednesday 4 September 2013

CASEing Ally

This week at Flourishes, the focus is on the amazing Allison Cope - see her picture, her story and some of her wonderful work HERE.  What an array of beautiful cards!  I chose to CASE this one.  I used the same layout, the same areas of white, and check paper, but I changed the colours, the stamp set, the sentiment, and I omitted the stitching and added some pearls.  I used Flourishes Zinnias stamp set plus the Flourishes Just Because sentiment set.  For the sentiment piece, I used a Spellbinders Fancy Tags Two, and for the border, I used Spellbinders Fleur De Lis Borderabilities.  I used the same Cuttlebug embossing folder - it goes so beautifully with the check paper, and I layered my card front onto yellow cardstock.  Thanks for the lovely design, Ally - I hope you are enjoying your week in the spotlight!

Copic Colours used were:  Y11, Y15, Y17, YG03, YG63, YG67, E23, E25, E27.

Thanks so much for visiting my blog!

Saturday 31 August 2013

Girlfriends

 
The challenge this week at A.R.T. is to use Ribbons and Pearls.  Well, since these are probably my favourite embellishments, this was a really easy one!  I started this card with black cardstock and layered on two papers from a Cre8tiv mini stack paper pad.  Then I covered the join with a wide pink satin ribbon and added a black pleated satin ribbon over the top.  I stamped one of the gorgeous girls from Flourishes Glamour Girls stamp set with Memento ink onto blending card, coloured her with copics, and die cut it with a Spellbinders Labels 20.  I flicked some pink colour in from the edges and layered the image piece onto black cardstock and then added it to the background with foam tape.  The sentiment is from the same stamp set and was stamped with black ink onto white card, layered onto black card and tucked partly under the image piece.  Three black pearls at both right hand corners and it was finished!

Copic Colours used were:  E000, E01, E51, Y21, E31, RV52, RV55, C3, C5, C7.

Thanks so much for coming to visit!

Thursday 29 August 2013

Gardening

The challenge this week at Timeless Tuesday is to use disressing.  Well, this is not a technique I usually use, but it IS a challenge, right?  Okay, I started with green cardstock and sanded the edges, then layered on paper from Playdate paper pad (My Mind's Eye).  Then I embossed a piece of green cardstock with a Cuttlebug embossing folder, sanded it and added it to the background.  I added yellow striped ribbon with a knot tied in it.  Next, I die cut So Saffron cardstock (Stampin' Up!) with a Spellbinders Labels 8 and sponged the edges with Green versacolor ink.  Finally, I stamped an image from Flourishes Garden Dreams stamp set with Memento ink onto blending card, coloured it with copics, die cut it with a Spellbinders Classic Oval, layered it onto green cardstock and attached it with foam tape.


Copic Colours used were: B0000, B21, B23, B26, G21, G24, G28, Y21, Y26, R22, R24, R27, E40, E43, E50, C1, C3.


Thanks so much for visiting!


CASEing Tosha


This week at Flourishes, the focus is on the very talented Tosha Leyendekker.  You can read her story and see some of her beautiful work HERE.  Eventually, I decided to CASE this card.  I used the same layout, but changed the colour scheme and the stamp set.  I also omitted the stitching and the button, and added some bling.  The papers I used came from Kaisercraft's True Romance paper pad, and the stamp set I chose is Flourishes Orchids set.  The border punch is an EK one, and the die is Spellbinders Labels Four.  The ribbon is silk from a pack I bought at Craft Queen and is lovely to work with.
Thanks for the lovely design, Tosha - hope you enjoy your week in the spotlight!

Copic Colours used were:  RV32, RV34, RV91, RV93, RV95, Y11, Y15, Y17, G40, G43, G46.

Thanks for visiting my blog!

Saturday 24 August 2013

Beach Babe

It's "Anything Goes" over at A.R.T. this week so I thought I would use this card that I made for this weeks Colour Challenge at Splitcoaststampers.  I started with a base of Strawberry Slush cardstock (Stampin' Up!) and layered on paper from Cambridge Court DSP (My Mind's Eye).  I punched a piece of Daffodil Delight cardstock (SU) with a Martha Stewart border punch and added a strip of white cardstock which I had stamped with an old Kaisercraft sentiment.  Then I die cut another piece of the D.D. cardstock with a Spellbinders Nautical Frames and Accents die, trimmed it and added it above the sentiment piece.  The stamps come from Sea Breeze stamp set (Clear Impressions) which came with a Creative Stamping magazine.  I stamped the beach hut and girl with Memento ink onto blending card, coloured them with copics and cut them out.  The beach hut is attached directly to the background and the girl is added with foam tape.  The "sun"(from another old set) was simply stamped onto D.D. cardstock, cut out and added to the top right corner.

Copic Colours used were:  B24, B26, YR04, YR07, BG13, BG32, Y15, Y17, RV14, RV17, E000, E01.

Thanks so much for coming to visit!

Wednesday 21 August 2013

Sewing Box

The challenge this week at Timeless Tuesday is to use a doily.......Easy Peasy!!  I started this card by die cutting a piece of blue cardstock with a Spellbinders Decorative Labels 8.  Next, I die cut paper from Garden DSP (Crafter's Choice) with a Spellbinders Labels 8, added half a paper doily and wrapped a piece of blue satin ribbon around it, covering the cut side of the doily.  I stamped the sewing box from Flourishes Stitched For You stamp set with Memento ink onto blending card, coloured it with copics, the die cut and embossed it with a Spellbinders Labels 8.  I layered the image piece onto some pink cardstock and added it to the background with foam tape.  I made a tiny tag by stamping the sentiment (from Stampin' Up!'s Teeny Tiny Sentiments set) onto white cardstock and layering it onto blue cardstock.  I added the tag and a blue satin bow and it was finished!

Copic Colours used were:  RV52, RV55, B00, B02, YG11, YG13, YG17, BV00, BV02, Y11, Y15, Y21, Y35, E31, E33, E25, E27, E50, E51, C1, C3, C5, C7.

Thanks so much for visiting my blog!

Thursday 15 August 2013

My Favourite Man

The challenge at Scrapbook Boutique  this month is to make a card for our favourite man using shades of brown, white and a mustache feature.  Well, here's where I say a big thank you to my friend, Kim, who recently gave me Kaisercraft's Sears & Son stamp set which contains - yes!! - a mustache!  I chose brown background paper from Papermania's Birdsong paper pad and stamped it with the mustache stamp alternately with Memento Rich Cocoa and Versacolor Topaz.  It looked kinda fun when it was done, and it was a bit of a shame to cover some of it!  Then I  layered the background onto dark brown cardstock, then die cut a piece of the same cardstock with a Spellbinders Decorative Labels One die and added it to the right hand side.  I stamped the antique car (from the same Sears & Son set) with Memento Rich Cocoa ink onto blending card, coloured it with copics, added the sentiment (from Flourishes Fathers Day set) die cut it with a Spellbinders Labels One die and sponged on some Versacolor Topaz ink, then added it with foam tape.  A piece of brown grosgrain ribbon with a knot tied in it completed my card.
I have been blessed to have several special men in my family, including my wonderful Dad who turns 95 next month, but this card is going to my DH who IS my Favourite Man!

Copic Colours used were:  E30, E31, E33, E50, C3, B0000.

Thanks so much for coming to visit!

Wednesday 14 August 2013

Autumn Thoughts

The challenge this week at Flourishes Timeless Tuesday is to use Autumn Colour.  Well, my first thought was to use the lovely Autumn Blossoms stamps (Flourishes) so I stamped the two corner images with Memento ink onto blending card, die cut it with a Spellbinders Labels 8 die, coloured it with copics, stamped the sentiment (from Flourishes Orchids set) in the middle and sponged the edges with Versacolor Orange ink.  The background papers are from Citrus Stack (DCWV) layered onto dark red cardstock.  I coloured a piece of May Arts mesh with copic G40 and added that to the panel piece then attached the multicoloured ribbon tied with a knot along the bottom.  I die cut some green cardstock with a Spellbinders Decorative Labels 8 and added that to the background and finally added the image piece with foam tape.

Copic Colours used were: YR02, YR07, YR20, YR24, YR27, Y21, Y26, G40, G43, G46, G82, G85, YG91, YG95, E23, E25, E27, R89.

Thanks for coming to visit!

Sunday 11 August 2013

The Birdhouse

It's Release Week at Flourishes and this month it's a Colour Combo of Teal, Rust and Grey.  Well - not easy colours!! So I went looking through my -um - extensive selection of Flourishes stamps to see what would work with these colours.  I decided on this great little birdhouse from the Friendly Reminders set so I stamped it with Memento ink onto blending card, coloured it with copics, cut it into a long oval and lightly sponged the edges with Versacolor Turquoise ink.  The background papers are from Birdsong DSP (Papermania), layered onto rust cardstock.  I tied a knot in the teal striped ribbon and added it to the background.  Then I die cut some grey cardstock with a Spellbinders Radiant Rectangles die, added that to the background, then attached the image piece with foam tape.  Finally, I stamped the sentiment (from the same stamp set) directly onto the patterned paper.  These aren't colours I would normally choose, but I was quite pleased with the result.  Can't wait to see what new stamps will be released this week!!

Copic Colours used were:  E11, E13, E15, E17, E19, C3, C5, C7, BG32, BG45, BG49.

Thanks so much for coming to visit!

Friday 9 August 2013

Teachers Have Class!

This week over at A.R.T. the challenge is to make something with a School Theme!  I make these accordian cards every year to sell in my craft group's Christmas shop, so this was a good opportunity to get started early.  First, I made a base with a strip of red cardstock and scored it in three places so it would fold up.  The papers are from Kaisercraft's Class Act paper pad and the tape measure on "page 1" is out of a Christmas cracker (I KNEW that would come in handy one day!!)  The globe on the same page was made by die cutting black cardstock with a Retro Globe and Stand die by Fancy That and attaching it to blue cardstock cut out with a 2" circle punch.  The stick-on elements on "pages 2 & 4" are from a pack of Dress It Up buttons called Pencil Box and the "Journal" on "page3" is actually a rub-on on acetate, cut out and added with foam tape.  The letters of the word "Teacher" were stamped with red ink onto white cardstock, cut out and layered onto red cardstock.  The sentiment across the top was simply written by hand with a black pen onto white paper and cut out with deckle edge scissors.  So, that's my "school theme" entry for A.R.T. - a random Thursday card challenge.......certainly not my usual style!!

Thanks so much for visiting!

Wednesday 7 August 2013

Zinnias Galore!

This week at Flourishes Timeless Tuesday the challenge is to stamp a background to match the main image.  I started my card with a piece of spotted paper from BoBunny's Double Dot Designs paper pad.  I chose the small image from Flourishes Zinnias set and stamped it all over the paper with Versacolor Peony ink and then again with Versacolor Opera Pink ink, then I layered the paper onto dark pink cardstock.  I coloured a paper doily with copic RV00, sliced off one side and added it to the background.  I added a deep pink ribbon and then die cut white cardstock twice with a Cheery Lynn Lace Corner Deco B die and added those to the two right hand corners.  I stamped the zinnia bunch with Memento ink onto blending card, die cut it with a Spellbinders Timeless Rectangles die, coloured it with copics, stamped the sentiment (from Flourishes Tag Lines) with Versacolor Peony ink and added it to the background with foam tape.  A pink bow across the ribbon and it was finished!

Copic Colours used were:  RV52, RV55, RV66, YR21, YR24, YR27, G40, G43, G46.

Thanks so much for visiting my blog!

Monday 5 August 2013

Shopping!

The challenge over at A.R.T. this week is a colour challenge.  Ooooooooh!  This was a hard one!  And, after a week completing all 42 challenges for Dare To Get Dirty week at Splitcoaststampers (where my User name is Waratah, by the way), my brain is VERY tired, not to mention that my craft room looks like a whirlwind went through!!
Anyway, for this card, I started with dark red cardstock and layered on the pale green background paper (from Kaisercraft's True Romance DSP), thenI added a panel of the blue on blue spot paper (from B0Bunny's Double Dot Designs DSP) which was layered onto dark brown cardstock.  I stamped the image which is from Docraft's Born to Shop series, with Memento ink onto blending card, die cut it with a Spellbinders Long Scalloped Rectangles die, coloured it with copics, layered it onto dark red cardstock and added it to the card front with foam tape.  The sentiment, from the same set, was stamped with Cherry Cobler ink (Stampin' Up!) onto white card, die cut with a Spellbinders Classic Oval and layered onto dark red cardstock die cut with a Spellbinders Scallop Oval and added with foam tape.  I finished off with three blue pearls in the top right corner.

Copic Colours used were:  E000, E01, E25, E27, E29, G40, G43, B00, B21, B23, R89.

Thanks so much for coming to visit!

Sunday 4 August 2013

CASEing Maki

This week at Flourishes, the focus is on the amazingly talented Maki Jones.  You can read about her and see some of her beautiful creations HERE.  Such choices - but I chose this card.  I used the same layout and stamp which is from Flourishes Spring Bouquet, also the same die - Cuttlebug Vintage corner die but changed the colours and the sentiment (mine is from Flourishes Tag Lines).  I also omitted the pearls and the piercing but kept the idea of the monochrome colouring.  Thanks Maki - enjoy your week in the limelight!

Copic Colours used were:  V000, V01, V04, V12, V15, V17, V22, V25, V28, RV91, RV93, RV95, G40, G82, G85.

Thanks for coming to visit!

Friday 2 August 2013

The Bridesmaid

This weeks challenge at Timeless Tuesday is to use "Old, New, Borrowed and Blue" from the old wedding rhyme.  For my something old, I used an old DSP from Stampin' Up! called, I think, Petals and Paisleys.  I layered one piece onto blue cardstock for the base and added another piece in a notched strip layered onto pink cardstock.  My something new is the Flourishes Glamour Girls set which arrived in my letterbox last week (Yay!)  I stamped the gorgeous girl with Memento ink onto blending card, coloured her with copics, die cut with a Spellbinders Classic Oval die and layered it onto pink cardstock cut with the next size oval die.  I " borrowed" the layout from this card - a creation by the lovely Heather Jensen, and, of course, used blue in the paper, colouring, and button.  The ribbon and bow are pink seam binding.  I also added a little bling because I thought the bridesmaid should have some!!

Copic Colours used were:  B00, B02, RV10, RV13, RV21, E000, E01, E50, Y21, E31.

Thanks so much for visiting!

Sunday 28 July 2013

Live in the Moment

This is my final card for Flourishes Birthday Challenges.  The very clever Heather Jensen provided a tutorial on inked backgrounds - see it HERE - and the challenge is to create something similar. HUH!  This is way, WAY outside my comfort zone!  I don't own any distress inks or the tools required and I nearly gave this one a miss.  But I really wanted to complete all the Birthday challenges.  So, just for a laugh, I decided to make my "inked background" with copic refill inks, blender solution and a paintbrush!!
Anyhow, the image and sentiment are from Flourishes Country Road set, stamped with Memento ink onto blending card and die cut with a Spellbinders Romantic Rectangle die.  The papers are from Kaisercraft's Pink Gelato paper pad and I used a Martha Stewart border punch to pretty things up a bit.  In my scrapbox I found a strip of blue cardstock which had been cut with fancy edged scissors - I cut it to size, wrapped it with white satin ribbon and added a bow.  Done!
I know, I know!  My so-called "inked background" looks like something a pre-schooler would do and has none of the subtle elegance of Heather's gorgeous creation, but, what can I say??  I gave it a go (and it was kind of fun!)

Copic Inks used were:  B00, RV10, G21, O.

Thanks for visiting!

Saturday 27 July 2013

Six for Six

The final challenge for Flourishes 6th Birthday celebrations is Six for Six - that is, a six part recipe.......1. A Sketch, 2. An Inspiration picture, 3. Bling, 4. Ribbon or twine, 5. Embossing, 6. Favourite Flourishes Stamp.  Well, that last one was the most difficult!  I ask you, how do you choose a Flourishes favourite???  I eventually decided on the Magnolias for two reasons.  Firstly, because they are a dream to colour, and secondly, because my very first magazine publication featured this gorgeous stamp set AND one of my cards was on the magazine cover!  No wonder this set has a special place in my heart.
So....on with the card!  I chose paper which matched the inspiration picture (2) from Nana's Nursery Baby Girl (DCWV) and layered it on to green cardstock.  Firstly, I turned the sketch on its side (1).  Then I die cut green check paper (from the same paper pad) with a Spellbinders Labels 8, embossed it (5) with a Sizzix embossing folder and layered it on to pale peach cardstock.  I chose two other papers from the same paper pad and created two tags and then made the third tag from green check ribbon.  The ribbon (4) along the top is white seam binding coloured with copic R01.  I added a large faceted gem (3) to the bow and three small ones to the bottom left corner - these were from a Vintage Finds pack (Teresa Collins).  Finally, I stamped the large magnolia image (6) from Flourishes Magnolias stamp set with Memento ink onto blending card, coloured it with copics, cut it out, and attached it to the die cut and embossed piece with foam tape.  And that's my version of the six part recipe!

Copic Colours used were:  R000, R01, R20, YG13, YG17, YG67, E25, E29.

Thanks for coming to visit my blog!

Thursday 25 July 2013

CASEing Heather

The Designer in the focus at Flourishes this week is the very talented Heather Jensen.  You can read her story and see some of her beautiful creations HERE.  After enjoying the selection of Heather's work, I decided to CASE this card.  I kept the same layout and a similar colour scheme, but changed the image and omitted the stitching.  I chose the image from Flourishes Garden Picks, coloured it with copics, die cut it with Spellbinders Classic Oval and sponged on some beige ink around the edges.  Instead of the stitching element, I chose to add some sparkle - with the paper strip and the lace.  This was also the first time I had used seam binding and I just loved the way it softens a bow - I can see I'll be using more of it in the future!  Thanks for the lovely design, Heather, and I hope you enjoy your week in the spotlight!

Copic Colours used were:  BV00, BV02, BV04, YG11, YG13, YG17, YG67.

Thanks for coming to visit!

Wednesday 24 July 2013

Christmas in July

Part of Flourishes Birthday celebrations is a Christmas card challenge. I started this card with red cardstock and layered on this gorgeous paper from Rejoice paper pad by Creative Imaginations (picked this one up at the Brisbane Papercraft Expo and am so glad I did!).  I punched a piece of white cardstock with this Martha Stewart picket fence border punch, added it to the background, and wrapped it with red satin ribbon and added a bow.  Then I stamped the bow image from Flourishes Christmas Classics stamp set with Memento ink onto blending card.  I added the sentiment (from the same stamp set) with Real Red ink (Stampin' Up!) and die cut it with a Spellbinders Opulent Ovals die, then coloured it with copics.  I die cut the red cardstock with the next size Opulent Oval die and then die cut white cardstock with the largest Spellbinders Scallop Oval and added these two to the background.  Finally, I added the image piece with foam tape, and three little red pearls to each top corner.

Copic Colours used were: R22, R24, R27, Y21, Y35, Y38, G21, G24, G28, YG13, YG17.

Thanks so much for coming to visit!

Christmas Wish

This weeks challenge at Flourishes Timeless Tuesday is for a Christmas Card that is fairly flat for mailing.  I started this card with Real Red cardstock (Stampin' Up!) and layered on the star paper from Christmas Basics (Crafters Choice).  Another paper from the same collection was layered on more red cardstock which had been punched with Martha Stewart's Modern Garland border punch.  This was wrapped with red satin ribbon, a bow added and attached to the centre of the background.  I stamped the sentiment from Flourishes Christmas Classics set with Real Red ink (SU) onto white cardstock, die cut it with Spellbinders Decorative Labels One and added it to the card front.  Finally, I stamped the santa hat from Flourishes Dear Santa set with Memento ink onto blending card, coloured it with copics, cut it out and attached it with foam tape.  Result = a card with a little dimension but still reasonably flat.

Copic Colours used were:  R22, R24, R27, YG63, YG67, Y21, Y35, Y38, C1.

Thanks for coming to visit!

Sunday 21 July 2013

6th Birthday

It's Flourishes 6th Birthday, and as part of the celebrations, there's this challenge for  a 10 Minute Birthday Card!  Well, that's a hard one for me - I usually take an hour or more!!  So, I got everything ready, looked at the clock, and really hit the accelerator.  I stamped the bike with a present in the basket from Flourishes Bike Ride stamp set with Memento ink onto blending card, die cut it with a Spellbinders Classic Oval and coloured it with copics.  Then I cut red cardstock with the next largest oval and blue cardstock with the largest scallop oval.  I punched red cardstock with a Martha Stewart border punch and added white cardstock stamped with the birthday sentiment from Flourishes Sweet Violets set and attached that to a background of blue cardstock.  The paper  from Playdate DSP (My Mind's Eye) was added next, and finally the scallop oval and the stamped piece with foam tape.  Whew!  Okay, it took just a little more than 10 minutes but that was the best I could do!

Copic Colours used were:  B21, B24, Y21, Y26, R22, R24, R27, C1, C3, C5, C7, G40, E50.

Thanks for coming to visit my blog!

Cherry Blossom

The challenge over at A.R.T. - a random Thursday card challenge, this week is a CAS Sketch.  Well, I struggle with CAS designs - I always want to add more layers, papers, embellishments etc. etc. - but I finally decided to go with a pink and white theme and Flourishes Cherry Blossom stamp set.  I stamped the large image with Memento Rose Bud ink onto blending card, cut it to make my background and layered it onto pink cardstock.  I coloured just three of the flowers to make that element of the sketch.  The patterned paper is from Henbury Lane DSP (Papermania), layered onto white then pink cardstock.  Then I stamped the small image with Memento Tuxedo Black onto blending card, die cut it with a Spellbinders Romantic Rectangles die, coloured it with copics, layered it onto pink cardstock and added it to the card front with foam tape.  Finally, I stamped the sentiment - from Flourishes Sweet Violets set directly onto the background.

Copic Colours used were:  RV00, RV02, RV21, YG11, YG13.

Thanks so much for coming to visit!

Friday 19 July 2013

3 Mini Cards

The challenge at Timeless Tuesday this week is for a set of 3 mini cards.  I created the card bases by die cutting white cardstock with the largest of the Spellbinders Long Classic Scalloped Rectangles die - three times, of course!  The background papers are from Kaisercraft's Botanical Odyssey paper pad and were layered onto yellow cardstock.  Then I die cut some brown cardstock with three different dies from Spellbinders Floral Flourishes, cut them to fit and added them to the backgrounds.  Next, I die cut blue, yellow and pink cardstock with a Spellbinders Scallop Oval die and added them to the backgrounds.  Finally, I stamped the images from Flourishes From the Garden stamp set with Memento ink onto blending card, coloured them with copics, cut them out and attached them to the ovals with foam tape.

Copic Colours used were:  Y21, Y23, Y26, YG11, YG13, YG17, RV00, RV02, BG11, BG13, BG15.

Thanks for coming to visit my blog!

Wednesday 17 July 2013

Black & White

This month, Flourishes (my favourite stamp company, in case you didn't know - he he!) is celebrating their 6th Birthday.  Part of the celebrations include some special challenges and this one, a Black and White Challenge, is the first one.  I started this one with black cardstock, layered on two strips of plain white cardstock and embossed a rectangle of white with Cuttlebug Textile EF and added that.  I added faux black stitching along the edges of the plain pieces and covered the joins with black stitched ribbon.  I die cut some black cardstock with a Spellbinders Timeless Rectangle die and added that to the background.  I chose the image from Flourishes Bloomin' Aussie Florals stamp set, stamped it with Memento ink onto blending card, coloured it with only grey copics, cut it out and added it to the black rectangle with foam tape.  Finally, I stamped the sentiment, from Teeny Tiny Sentiments (Stampin' Up!) in the bottom right corner.

Happy Birthday to Flourishes and a special hello and thank you to Jan Marie Caruso - the creator of  this fabulous stamp company! 

Copic Colours used were:  C1, C3, C5, C7.

Thanks so much for visiting my blog!

Joy

The challenge this month at Scrapbook Boutique is for a Winter Theme using the colours brown, turquoise and white.  I decided to use this image from Flourishes Joy is in the Air stamp set.  I stamped the snow globe image with Memento ink onto blending card, then added the snowman image, coloured it with copics and cut it out.  I started the background with brown cardstock and layered on a strip of paper from 12 days of Christmas paper pad from My Mind's Eye.  Then I embossed white cardstock with a Cuttlebug "snow" embossing folder and added it to the brown cardstock and wrapped a turquoise and white spot ribbon over the join.  I created a frame by cutting turquoise cardstock with a Spellbinders Standard Circle die within a Lacey Circle die and added that to the background.  I attached the stamped piece with foam tape then die cut white cardstock twice with a Stampin' Up! Sizzlits Merry Details die and covered them with a thin layer of kindy glitz.  After they dried I attached them over one side of the ribbon and finally stamped the sentiment which is also from the same stamp set directly onto the patterned paper.

Copic Colours used were:  B0000, B00, BG11, BG13, BG15, BG45, BG49, E11, E25, E27, YR04, C3, C5, C7.

Thanks so much for visiting!