Thursday, 25 May 2017

Framed

Hello! This month at Power Poppy, the Power & Spark challenge is hosted by none other than my Darling Daughter, Kathy Jones so I just HAD to get into my craftroom and give this one a go. The challenge itself is pretty simple - make something and frame it. Well, I needed to make a birthday card for a special friend so picked the Power Poppy digi Camellias and printed it onto blending card, coloured it with copics and cut it into a large oval shape. I created the frame by using a Spellbinders Classic Oval die inside a Floral Oval die and pink cardstock then adhered it to the image piece. That was one frame. Then I made the card base out of white cardstock die cut with Spellbinders Decorative Labels Eight with an extra one cut and embossed over the top to make a second frame. I used some yummy pink paper from Maja Designs and die cut it with a corresponding Labels Eight, glued it all together with the framed image piece added with foam tape.  Thanks for this great challenge, Kathy and many blessings to all the girls at Power Poppy.

Thanks so much for coming to visit!

Friday, 8 July 2016

Birdie Birthday

I made this card for this month's Power & Spark challenge at 
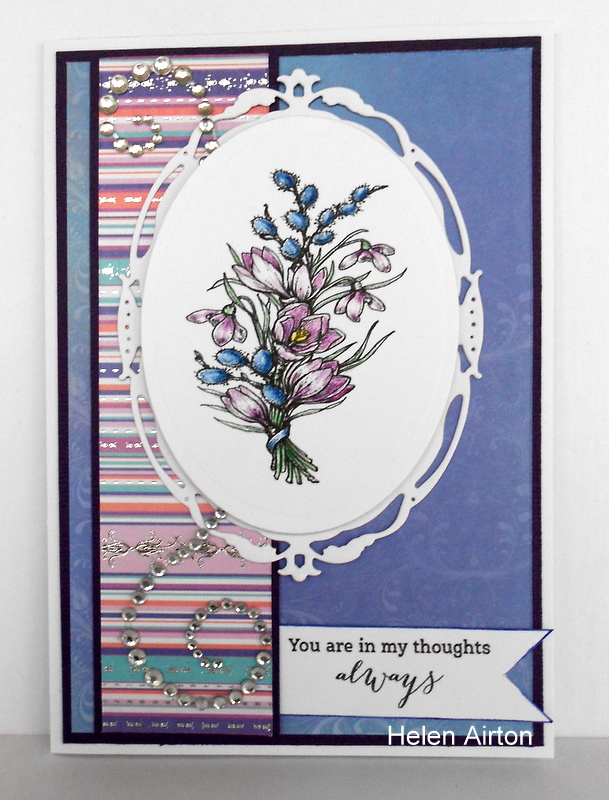
Power Poppy.  This time, the lovely and talented Kathy Jones asks us to "Be Happy" - by making a card using lots of things beginning with "B".  My first thought, of course, was to use the colour blue, so I started with Blue cardstock and a Border die (Spellbinders A2 Scalloped Borders One) and layered on Blue paper from Kaisercraft's Konstruct Collection.  Then I added some Braid, a Birthday sentiment (from Power Poppy's Go Wild stamp set), also a Banner from JustRite Buntings and Button Die set, plus some Buttons.  Finally I stamped this great image from Power Poppy's Short Stacks stamp set, which features a Bird, coloured it with copics, cut it out and popped it up with foam tape. Oh! and I did all the stamping with Black ink!!  What a fun challenge this is........thanks Kathy!

Copic Colours used were:  YG11, YG13, YG17, BV00, BV01, RV00, RV02, Y00, Y11, B00, B000, B21, B23.

Thanks for coming to visit!

Wednesday, 22 June 2016

Be Amazing

This month at Power Poppy, the very talented (and fit!) Cindy Lawrence challenges us to make "Happy Mail" for someone we'd like to "share the love" with - "just because" and for no reason at all!.  Well, I immediately thought of this great sentiment from the Power Poppy Orchids Rock stamp set.  I think we all need encouragement at times to remember how strong and  amazing we really are, just in living our everyday lives. I wanted to make this a bit different so I stamped the sentiment with Memento Luxe white ink onto vellum and embossed it with white embossing powder, tore along the top and bottom edges and attached it with yellow brads. The background paper is from the 6 x 6 paper pad Cambridge Court by My Mind's Eye layered onto yellow cardstock.  The image is the wonderful Power Poppy digi Dancing with Daffodils, coloured with copics, die cut with a Spellbinders Classic Oval and popped up on top of yellow cardstock die cut with a Spellbinders Lacy Oval die.

Copic Colours used were:  Y00, Y11, Y15, YG11, YG13, YG17, G43, G46, V12, V04, E41, E43, E44

Thanks so much for visiting!

Saturday, 14 May 2016

Springtime Flowers

This month at Power Poppy the very talented and clever Katie Sims challenges us to make a card featuring May flowers.  What could be more perfect, I thought, than Power Poppy's Springtime Love stamp set?  Well, I have to confess I cheated on this one because this card is part of a set which was published in Australian Cardmaking Stamping & Papercraft magazine in February (Volume 22 No.8) but I thought this was a perfect opportunity to give it an airing on my blog.......and I did change the sentiment!  The background papers are from Kaisercraft's Key to my Heart 12 x 12 paper pack, layered onto dark blue cardstock and the vertical piece was wrapped with dark blue satin ribbon.  I made the heart by diecutting white cardstock with a Spellbinders Lace Hearts die then I stamped the image with memento ink onto blending card, coloured it with copics, die cut it with a Spellbinders Circle die then layered it onto dark blue cardstock die cut with a Spellbinders Lacy Circles die.  This piece was added with foam tape and the sentiment is from Power Poppy's Go Wild stamp set, stamped with memento paris dusk ink and made into a tag.

Copic Colours used were:  B21, B23, B24, B26, RV000, RV10, RV13, RV91, RV95, R000, R01, R02, R81, R83, Y11, Y15, V04, V12 , YG11, YG13, G40, R43, G46.

Thanks so much for coming to visit!


Friday, 22 April 2016

Pink Lillies

I made this card for this month's challenge over at Power Poppy. This time, The lovely Christine fiendishly challenges us to choose only THREE colours for our image!!!!!  I ask you!  This one was really HARD but in the end, I just took a deep breath and went for it with a pink, a green and a yellow (see below).  I chose these gorgeous lillies which are a Power Poppy digi, printed it onto blending card, added the sentiment from Power Poppy's Go Wild stamp set and die cut it with a Spellbinders Romantic Rectangles Two die.  The pink background paper is from Kaisercraft's Secret Admirer 6 1/2" paper pad, layered onto yellow cardstock which I wrapped with yellow satin ribbon.  The image piece, after being coloured with only THREE markers was added with foam tape and a yellow bow finished it off.

Copic Colours used were:  RV04, YG13, Y11.

Thanks for coming to visit!

Wednesday, 30 March 2016

Always

Well, I'm back from holidays just in time to complete the very talented Stacy Morgan's challenge for this month at Power Poppy.  This one is a peek-a-boo challenge meaning images and/or sentiments peeking through the top layer from underneath.  One of my very favourite stamp sets is Power Poppy's Azaleas so that was the first thing that came to mind for this challenge.  I started with a piece of white cardstock and cut three circles in it using Spellbinders Standard Circles die.  Then I embossed it with Couture Creations Diamond Trellis EF.  I die cut circular frames from pink cardstock using the same die set and then I cut another circular frame for the centre circle using the circle die plus the scallop circle die and glued them in place.  I stamped the large image onto white cardstock using Memento Rose Bud ink and cut two pieces from it to peek through the top and bottom openings.  I stamped the sentiment with black ink onto pink cardstock to peek through the centre circle.  I stamped the small image with memento black ink onto blending card, coloured it with copics, fussy cut it and added it with foam tape.  Then I added some more bling and layered the whole thing onto pink cardstock for the card front.  That was certainly a different kind of challenge and I very much enjoyed creating my version of it so thanks Stacy!

Copic Colours used were:  RV00, RV02, RV04, G40, G43, G46, Y15.

Thanks for coming to visit!

Sunday, 21 February 2016

Blue and White Birthday

This month's challenge over at Power Poppy is to change your favourite colouring method.  Well, of course, that meant my copics were out, so I unearthed my watercolour pencils and watercolour paper pad for this one.  I stamped this beautiful image from Power Poppy's Poppies stamp set with Stazon ink onto watercolour paper and coloured it with blue, green and yellow pencils and used a aquabrush to blend.  Then I die cut with a Spellbinders labels 20 die and layered it onto blue cardstock.  My background papers are from a Papermania's Capsule Collection and I also used a Martha Stewart border punch and white satin ribbon.  I stamped the sentiment from Power Poppy's Go Wild stamp set and added the image piece with foam tape.  Thanks for the challenge, Ally.........it's always a stretch to colour without my beloved copics but it was fun.

Thanks for coming to visit my blog today!

Saturday, 23 January 2016

Zig Zag Card

Happy New Year!  Yes, I know it's a bit late, but I'm taking things slowly these days.  This month, over at Power Poppy, Tosha challenges us to stretch ourselves - i.e. to make a tall card using a new product/technique. Well  my DD gave me five (Yes, FIVE - lucky me!) Power Poppy stamp sets for Christmas  so this is the first time I have used this gorgeous image from the Orchids Rock set.  For my tall card base, I decided to make a zig zag card (also a first for this technique) so I cut a diagonal piece from an A4 sheet of pear pizzazz cardstock, scored and folded at even intervals and punched the top edge with an EK scroll punch. Then I covered one side and the middle third of the other side with paper from an old Clover 12 x 12 paper pack called Cherished Days. I die cut peach cardstock with a butterfly die, sponged orange ink around the edges, coloured the antennae and added black pearls for the tallest part of the card.  Then I die cut yellow cardstock with Spellbinders Blooms One dies, added a dark green flourish and a couple of pale green pieces punched with Martha Stewart's branch punch for the middle part.  Finally I stamped the image with memento ink onto blending card, coloured it with copics and die cut it with a Spellbinders Labels Seventeen.  After sponging the edges with some yellow ink,  I layered that onto peach cardstock and added the sentiment (from Power Poppy's Go Wild set) with a couple more of the punched branches.  Thanks for the fun challenge, Tosha - I enjoyed this one and it will be a very different birthday card for my friend, Midge.

Copic Colours used were:  YG11, YG13, YG17, Y11, YR12, YR20.

Thanks for visiting my blog!

Saturday, 28 November 2015

Embellished Birthday

Whew!  What a busy few weeks it has been - and only getting even more busy with Christmas almost upon us.  However I just HAD to make time for this months challenge at Power Poppy because this one is hosted by none other than my beautiful daughter, Kathy Jones.  Kathy challenges us to "embellish it" - well, who doesn't just love prettying up their work with things like lace, ribbon and pearls - not me! I decided to use my favourite Power Poppy set for this one and stamped the azaleas in the vase from the Azaleas set  plus the birthday sentiment from Power Poppy's Dynamic Duos Peonies & Tulips set with memento ink onto blending card, coloured it with copics and die cut it with a Spellbinders Radiant Rectangles die.  My background papers are from Kaisercraft's Violet Crush paper pad and layered onto purple cardstock.  Then I did the embellishing with the lace, ribbon, pearls and a Kaisercraft pearl flourish.  Finally I layered the image piece onto lavender cardstock and popped it on with foam tape.  Thanks for a fun challenge, Kathy - I just managed to squeeze in before the end of the month!

Copic Colours used were:  V12, V04, V000, YG11, YG13, YG17, Y15, C1, B0000.

Thanks so much for coming to visit!

Sunday, 18 October 2015

Hollyberries

This months challenge at Power Poppy is hosted by the lovely and talented Julie and she asks us to cut our images into "Bits and Pieces."  For this one, I started with a folded white card base and die cut the side with a Spellbinders A2 Bracket Borders One die.  Then I die cut white cardstock with two dies from the same set, cut it to size and embossed the main part of it with Cuttlebugs Swiss Dots EF. I die cut red cardstock with the same die used for the card base and layered the white die cut and embossed piece onto it.  I printed out the Power Poppy digi "Hollyberries" twice onto blending card and chopped the images into three squares, coloured them with copics and layered them onto red cardstock.  I attached them with foam tape, wrapped some red ribbon round the card front and added a bow.  I stamped the sentiment from Power Poppys Merry Littles stamp set with red ink onto white card and punched it out with a 1" circle punch.  Finally, I die cut green cardstock with a Spellbinders Fancy Framed Tags Two die, stuck it in the middle of the ribbon and added the sentiment with foam tape.  Cutting up images is certainly not my usual M.O. but I really enjoyed this one - thanks Julie!

Copic Colours used were:  G40, G43, G46, R22, R24, R27, R89, E33, E35.

Thanks so much for coming to visit!

Saturday, 19 September 2015

Holiday Heart

This month's Power and Spark challenge at Power Poppy is to make a "gift from the heart". Well, every Christmas, I make these decorations, so I thought I would make one with a Power Poppy flair.  So, I start with a heart made of craftwood, paint the edges with gold paint and attach christmas paper to the front and back with modge podge.  There is a tiny hole at the top for the hanging ribbon. (My DH cuts these shapes out with a scroll saw for me.) This time I used Kaisercraft paper, sanded the edges then added a cream ribbon bow and some red pearls. I stamped the sentiment from Power Poppy's Bottlebrush Holiday set with red ink onto vanilla card, cut it out with a punch and inked the edges in red.  The gorgeous pointsettia is from Power Poppy's Merry Littles set, stamped with memento black ink onto blending card, coloured with copics and cut out.  I attached it with foam tape and added some "leaves" of green cardstock punched out with Martha Stewart branch punch.  These decorations can also be used as a gift tag.

Copic Colours used were:  R22, R24, R27, R89, Y21. Y26, Y38.

Thanks so much for visiting!

Monday, 27 July 2015

Playing With Paper

I made this card for this months Power and Spark challenge over at Power Poppy.  This time it's all about PAPER.......to use three different papers on the card.  Well, who doesn't just love delving into their paper stash?  I have been hoarding some lovely paper from Maja Designs and I thought that this would be the perfect opportunity to use some of them.  So I picked these pretty pinks from the Vintage Summer Basics collection and layered them onto black cardstock (to make them really stand out!). Then I die cut some more black cardstock with a Spellbinders Fleur De Lis Squares die and added the third paper to it after stamping it with the sentiment from Power Poppy's Dynamic Duos Peonies and Tulips set.  Next I stamped the single flower from Power Poppy's Simply Camellias set, coloured it with copics, cut it out and added it with foam tape.  Finally I added some lace and a pretty ribbon and bow.

Copic Colours used were:  RV91, RV93, RV95, G40, G43, B46, C1.

Thanks for visiting!

Saturday, 20 June 2015

A Jug of Flowers

I made this card for this months challenge at Scrapbook Boutique which is an inspiration picture featuring royal blue and gold.  I started this one with paper from Kaisercrafts Base Coat collection and layered it onto some glittery gold cardstock and then onto dark blue cardstock.  Next I punched the border from the gold card with Martha Stewarts Doily Lace punch.  I chose the image from Power Poppys Lilac Time stamp set, stamped it with memento tuxedo black ink onto blending card, coloured it with copics and die cut it with a Spellbinders Standard Circle die.  I die cut some dark blue cardstock with the largest Spellbinders Captivating Squares die, added it to the card front and attached the image piece with foam tape. I finally added a birthday sentiment at the bottom.

Copic Colours used were:  B21, B24, B26, Y000, Y11, Y13, Y21, Y38, YG11, YG13, YG17, G43, G46, E40, E41, C1, C3.

Thanks so much for coming to visit!

Wednesday, 17 June 2015

Always In My Thoughts


Apparently adult colouring books are now in the top bestseller lists.  Who knew?  Well, WE did, didn't we, fellow cardmakers?  There is no better therapy than sitting down with some stamped images and colouring them.  This month over at Power Poppy, the very talented Christine Okken challnges us to colour........Oh, but wait, she is asking us to use PENCILS.  UhOh.......now that IS a challenge for a copic addict like me. So I closed my copic case and dug out an old tin of Derwent colour pencils.  I chose the Power Poppy Winter Pick Me Up digital image and sentiment and made a tag with the sentiment and coloured the image with colour pencils (different to the copics but quite fun after all!).  I die cut the image piece with a Spellbinders classic oval and then die cut some more white card with a Spellbinders Opulent Oval die.  The papers for this project came from Kaisercraft's Magic Happens Collection and were layered onto purple card.  Some rhinestone flourishes for a bit of sparkle and it was done.

Derwent Colours used were:  Imperial Purple, Prussian Blue, Deep Cadmium, Mineral Green.

Thanks for visiting!

Saturday, 30 May 2015

Butterfly Birthday

I made this card for this months challenge at Scrapbook Boutique which has an inspiration picture featuring pink, white, peach and butterflies. Well, I really wanted to play with this embossing folder which came as a free gift with this months edition of Australian Simply Cards magazine.  I sponged versacolor orchid ink onto the inside of the folder and embossed a piece of white cardstock.  I mounted that onto pink cardstock which had been die cut with a Spellbinders Radiant Rectangle die.  Then, I simply used a corner rounding punch on a folded white card blank,  added the embossed piece to the top and stamped the sentiment (which is from the stamp set which came with the EF) at the bottom.  I die cut peachy pink cardstock with a Cheery Lynn Exotic Butterfly mini die and added it to the centre, then I die cut pink and white cardstock with the tiny butterfly from Spellbinders Flying Beauties die set and added them as well.  Some tiny white pearls for the bodies of the butterflies and it was finished.

Thanks so much for visiting!

Saturday, 23 May 2015

Anniversary


I'm baaa-ack!  After several really difficult months, I'm finally back in my craftroom creating for card challenges again - Yay!  For my first foray back into the cardmaking world, I've chosen to join the lovely ladies at Power Poppy for their monthly Power and Spark challenge. This month, Stacy challenges us to "cut it out".  Well, I've fussy cut these peonies a time or two, so I decided to go with that.  So I stamped the peonies from Power Poppy's Dynamic Duos Peonies and Tulips set with Memento tuxedo black ink onto blending card, coloured them with copics and cut them out.  Next I punched a border with a Martha Stewart punch onto white cardstock, cut it to size, embossed it with Couture Creations Cheerful EF and layered it onto red cardstock.  I stamped the sentiment with real red ink onto white cardstock, die cut along the top with a Spellbinders Romantic Rectangles die, cut it to size and added it with a strip of red ribbon.  Next I created a frame of white cardstock by die cutting with two Spellbinders Opulent Ovals dies, added that to the card front and popped the flowers on top with foam tape and that was it.

By the way, if you pop over to the Power Poppy blog you'll see a post featuring yours truely (yes, reallly!!) and my wonderful and talented daughter, Kathy Jones.  Thanks so much for the kind words, Julie - I'm still blushing!

Copic Colours used were:  R000, R22, R24, R28, G28, G43, G46.

Thanks so much for coming to visit!

Thursday, 13 November 2014

Joy to the World

Here's another Christmas card for the Peep of the Week challenge over at Power Poppy.  This image is from Power Poppy's very useful Joyful Arrangements set and was stamped with Memento Tuxedo Black ink onto blending card, coloured with copics and die cut with a Spellbinders Fleur De Lis Square die.  The background papers are from the Rejoice paper pad by Creative Imaginations - one of my favourites - and layered onto blue cardstock.  I used EK's Swirl border punch on the cream piece.  I added a blue ribbon and bow and popped the image piece on with foam tape and that was it - yet another non-traditional Christmas card!!(which, I have to say, is not my usual style.)

Copic Colours used were:  G40, G43, E50, E51, Y21, Y35, B000, B12.

Thanks for coming to visit!

Friday, 31 October 2014

Warm Wishes

Here's another card for the Peep of the Week challenge at Power Poppy.  My new Christmas stamps arrived this week so I just had to try one right away!  This gorgeous image is from Power Poppy's Bottlebrush Holiday set.  I stamped it with Memento Tuxedo Black ink onto blending card and added the sentiment in the banner with Memento Teal Zeal ink.  Then I coloured it with copics and die cut it with a Spellbinders Classic Squares die.  The background papers are from Francheville's Whimsical Christmas Basics paper pad.  The horizontal piece was layered onto pink cardstock with one edge punched with an EK border punch.  I die cut some teal cardstock with a Spellbinders Marvelous Squares die and popped the image piece on top with foam tape.  A pink ribbon and a bow was added to the horizontal piece, the whole thing was layered onto teal cardstock and Ta-Dah! - a Christmas card in non-traditional colours.

Copic Colours used were:  BG10, BG32, BG45, BG49, RV000, RV00, RV02, Y21, Y26, BV000, BV02, BV11, BV13.

Thanks for visiting!

Sunday, 19 October 2014

White Roses

I made this card for this months challenge at Scrapbook Boutique.  The inspiration photo features white roses, bows and pearls with pale lavender.  I knew straight away what I wanted to do with this one!  I started with lavender cardstock and die cut one side with a SpellbindersA2 Bracket Borders One die, then I embossed the rest with Couture Creations Exotic EF and wrapped white satin ribbon around at the die cut end.  Next, I stamped the roses image from JustRite's With Sympathy clear stamp set, coloured it with copics, die cut it with a Spellbinders Floral Ovals die and added it to the card front with foam tape.  I tied a bow with the satin ribbon leaving long tails and adhered it with the tails twisted to the top left corner.  Finally, I added a Zva Creative pearl flourish.  I enjoyed this one and it has turned out just like the picture in my head - not always the case :)

Copic Colours used were:  BV000, C1, G40, G43.

Thanks so much for coming to visit!

Sunday, 12 October 2014

Yellow Roses

Here's another card for the Peep of the Week challenge at Power Poppy.  The weather has really warmed up and the roses are blooming madly in our garden and vases of beautiful smelling flowers fill my house (lucky me!)  So I thought I would use this gorgeous Power Poppy digital image titled "Arranging Roses" for this weeks challenge.  I started with background paper from BoBunny's Country Garden Collection and layered it onto blue cardstock.  Next I cut a strip of yellow cardstock, adhered it to the bottom and wrapped it with blue ribbon.  The sentiment is from Power Poppy's Dynamic Duos set and was stamped onto white cardstock and die cut with a Spellbinders Romantic Rectangles Two die. I coloured the image with copics and die cut it with a Spellbinders Classic Oval.  Then I die cut blue cardstock with a Spellbinders Elegant Ovals die and popped the image piece on top with foam tape. Finally I die cut the butterfly with a Cheery Lynn Exotic Butterfly Mini die, added some tiny black pearls for the body and finished off with a tiny blue bow.

Copic Colours used were:  Y11, Y15, B000, B00, B02, R24, R27, G43, G46, C1, C3, C5.

Thanks for visiting!